
Users, roles and permissions
Everyone who uses the dashboard or POS is a member of the organization with one role and one or more outlets. Only owners and admins can open this page.
| Role | Access |
|---|---|
| Owner | Full access to everything, with no outlet boundary. |
| Admin | Full access within every assigned outlet: stock, purchasing, POS, prescriptions and the records tied to them. |
| Member | Only the features they are granted. Leads, accounts and contacts are always available. Outlet features (stock, purchasing, POS, prescriptions) stay locked until at least one outlet is assigned. |
Inviting a user
Section titled “Inviting a user”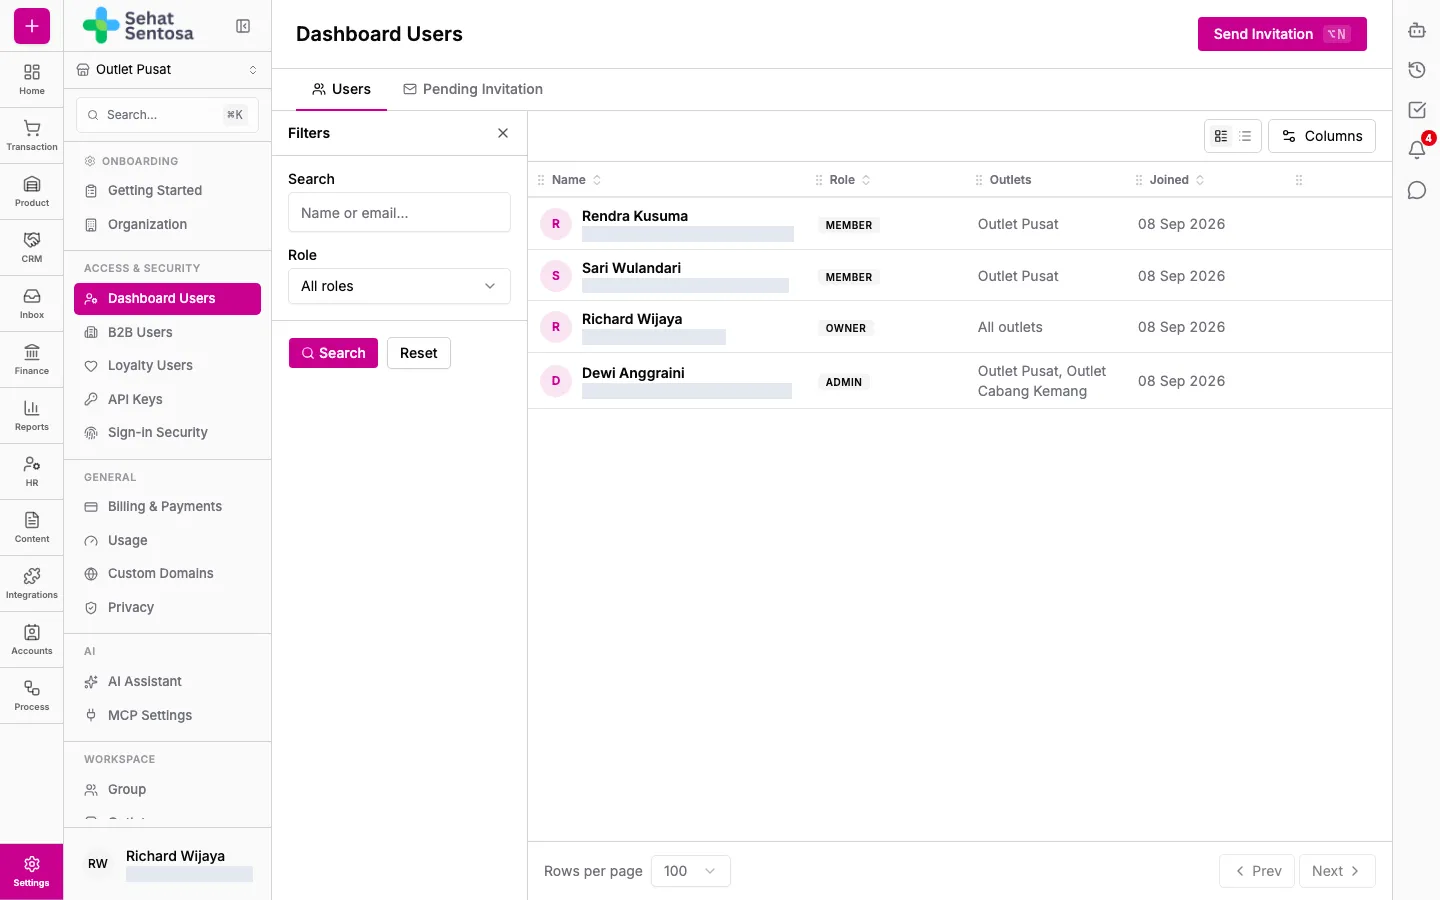
- Go to Account & Settings → Access & Security → Dashboard Users.
- Click Send Invitation.
- An owner can choose Existing User (by email) to add someone who already has a Medivy account, or Invite via Email to send an invitation.
- Enter the Email.
- Choose a Role. Only the owner can grant Admin or Owner; an admin can only invite Members.
- Tick the Assigned Outlets. An admin can only pick outlets they are assigned to.
- Click Send Invitation (or Add Member).
Your organization’s plan limits how many users you can have, and pending invitations count toward it. Once you reach the limit, the invitation isn’t sent and a message shows with a See plans button to see your plan in Billing and plan.
Invitations that haven’t been accepted appear on the Pending Invitation tab, where you can resend or cancel them (Cancel Invitation).
Changing role, outlets and permissions
Section titled “Changing role, outlets and permissions”Only the owner can open a member’s detail page.
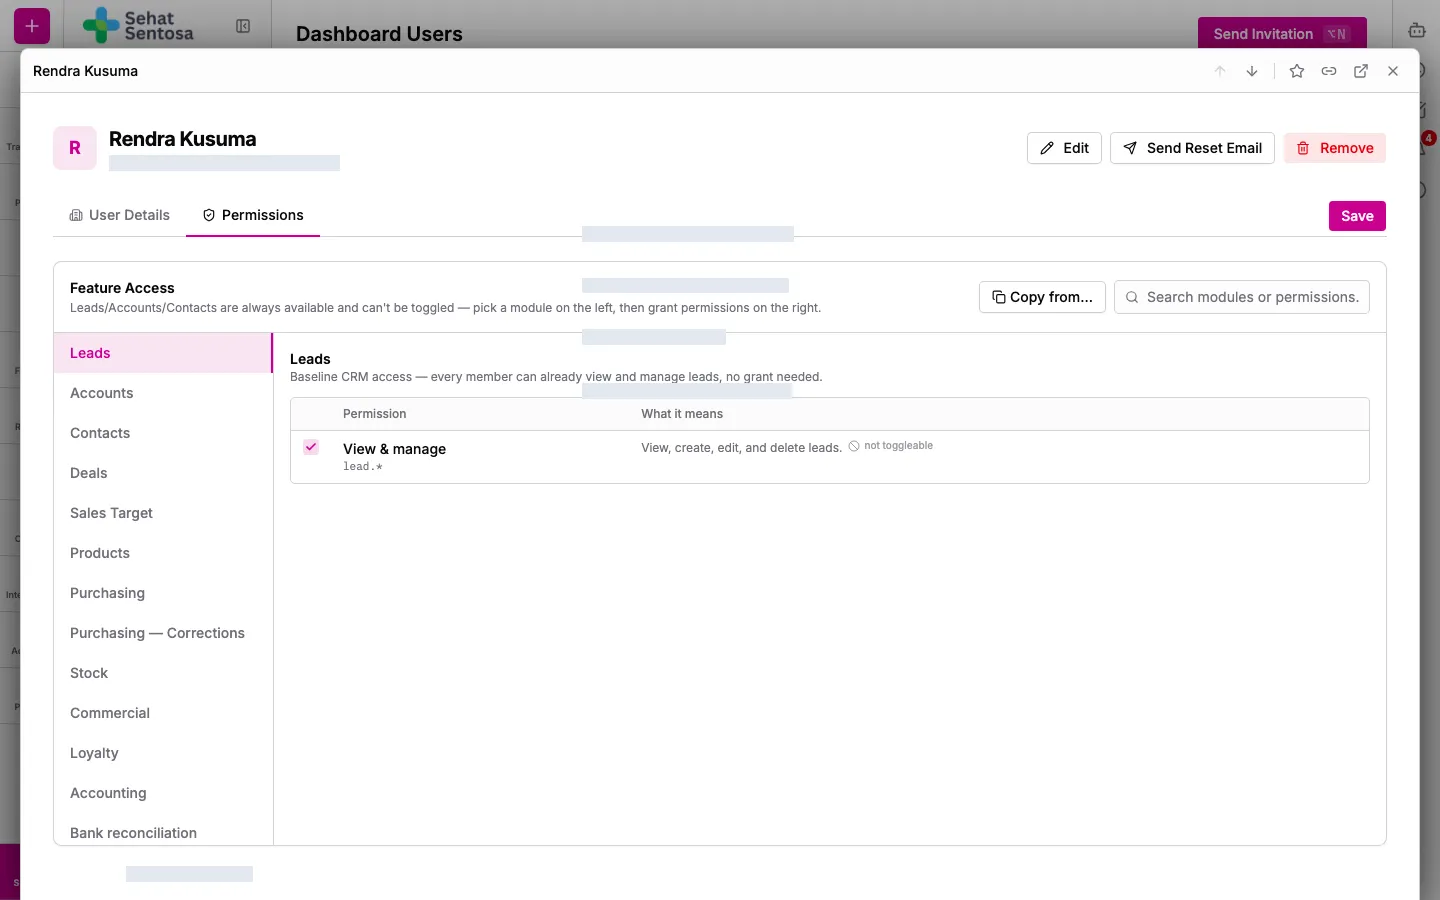
- In the Dashboard Users list, click the member’s name.
- On the User Details tab, change the Role or tick Assigned Outlets.
- For a Member, open the Permissions tab. Pick a module on the left, then tick permissions on the right. The What it means column explains each one.
- Click Save.
Other actions
Section titled “Other actions”- Send Reset Email: emails the member a password reset link.
- Reactivate: unlocks an account locked after too many failed sign-ins (use the password-reset variant if the attempts weren’t theirs).
- Remove: removes the member from the organization. They lose all access.