
Cash registers
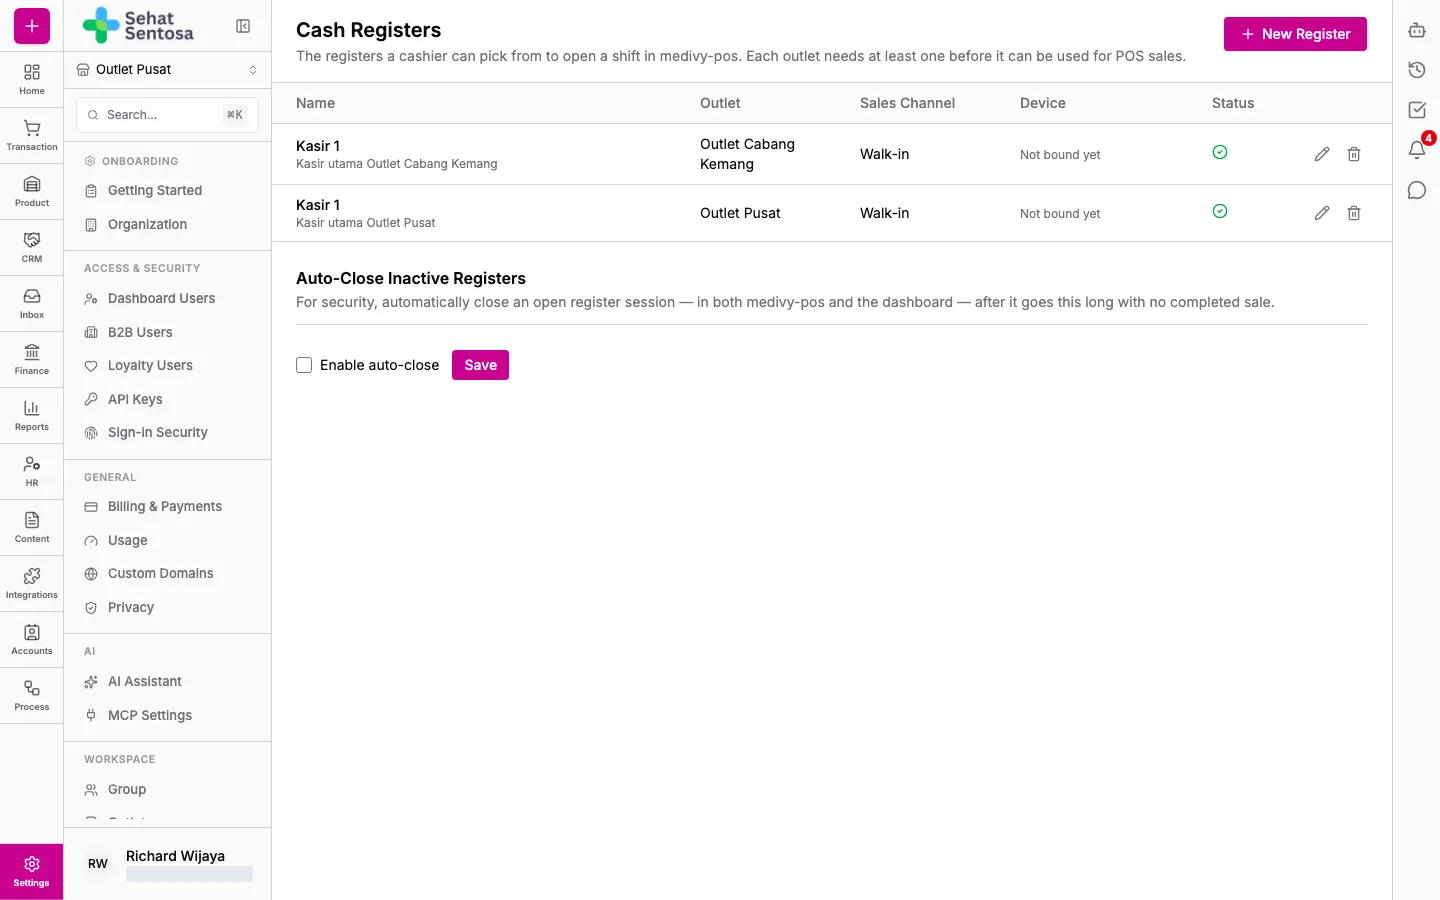
Cash Registers are the registers a cashier picks from to open a shift in the Medivy POS app. Each outlet needs at least one register before it can be used for POS sales.
Go to Account & Settings → Finance → Cash Registers.
Before you start
Section titled “Before you start”Set up your payment accounts and their channels first if you want to choose which payment methods each register accepts.
Add a register
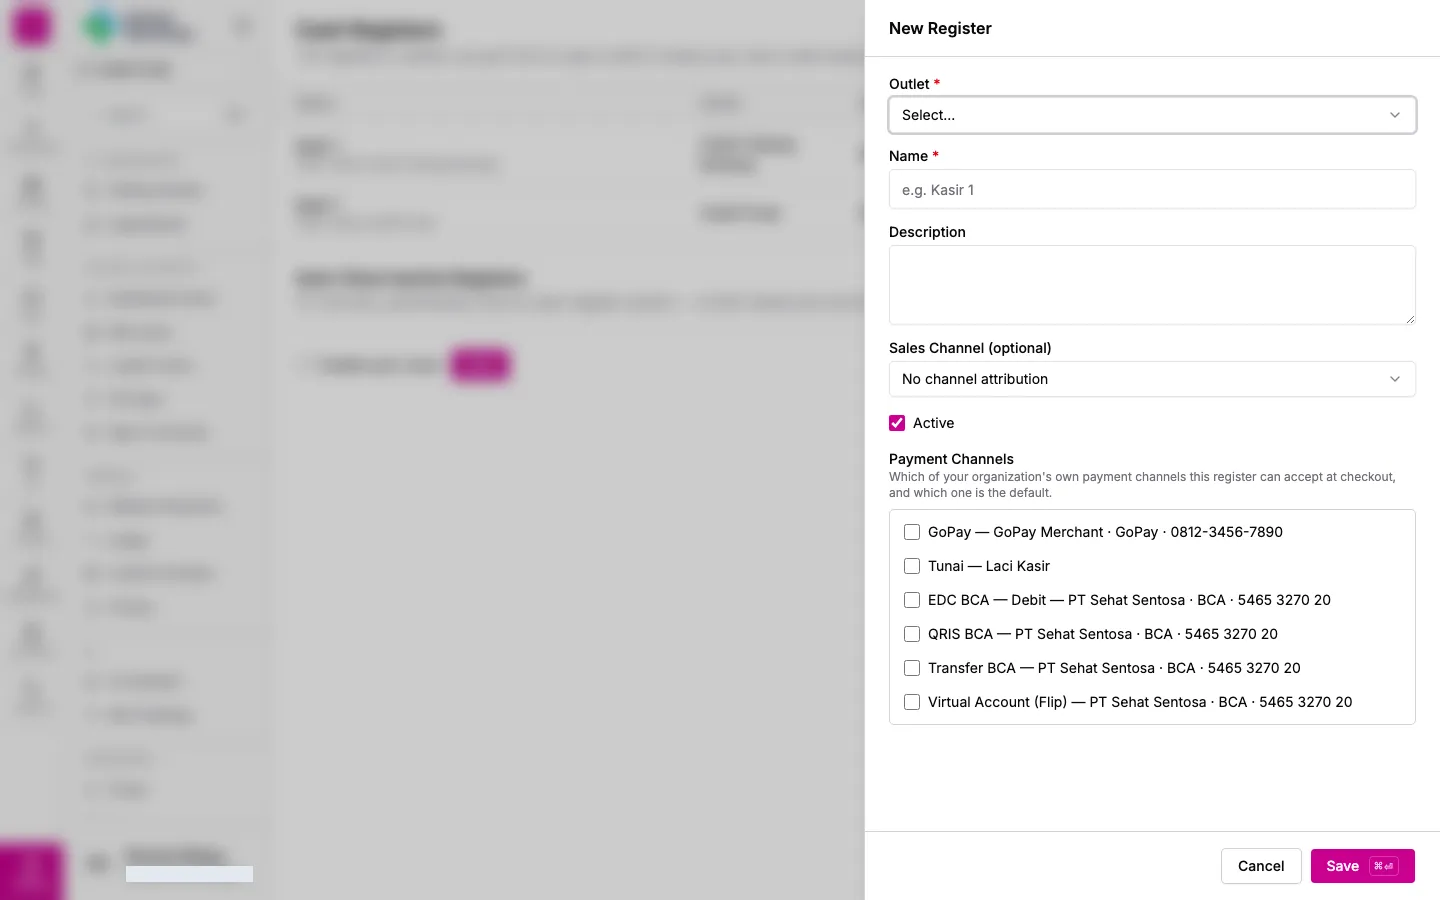
Section titled “Add a register”- Click New Register.
- Pick the Outlet.
- Enter a Name, e.g. “Kasir 1”, and a Description if useful.
- Pick a Sales Channel (optional) if every sale on this register should be attributed to that channel automatically, or No channel attribution.
- Keep Active ticked.
- Under Payment Channels, tick the channels this register can accept at checkout and mark one as Default.
- Save.
Bound device
Section titled “Bound device”A register binds to the POS device that opens its first shift. The Device column shows it, or Not bound yet.
A shift opened from another device isn’t blocked, but it is flagged on the session’s device page. To unbind (for example after replacing a device):
- Click the register’s row to open Edit Register.
- Under Usual device, click Unbind and confirm.
The next shift binds whichever device opens it.
Deactivate a register
Section titled “Deactivate a register”Click the delete icon on the register’s row and choose Deactivate. Shift history is kept; cashiers just can’t pick the register anymore.
Auto-close inactive registers
Section titled “Auto-close inactive registers”Auto-Close Inactive Registers closes an open register session that has had no completed sale for a set time, for security. It applies to every register in the organization.
- Tick Enable auto-close.
- Enter the number of hours of inactivity.
- Click Save.