
Payment accounts
Payment Accounts holds the accounts your business receives or pays money through: a till’s cash, a bank account, an e-wallet. Each of your own accounts has one or more channels (payment rails) such as bank transfer or QRIS. Cash registers then pick from these channels.
Go to Accounts → Accounts → Payment Accounts. The page has two tabs:
- Own Accounts — accounts your business controls.
- Third-Party Accounts — customer or supplier bank details kept on file.
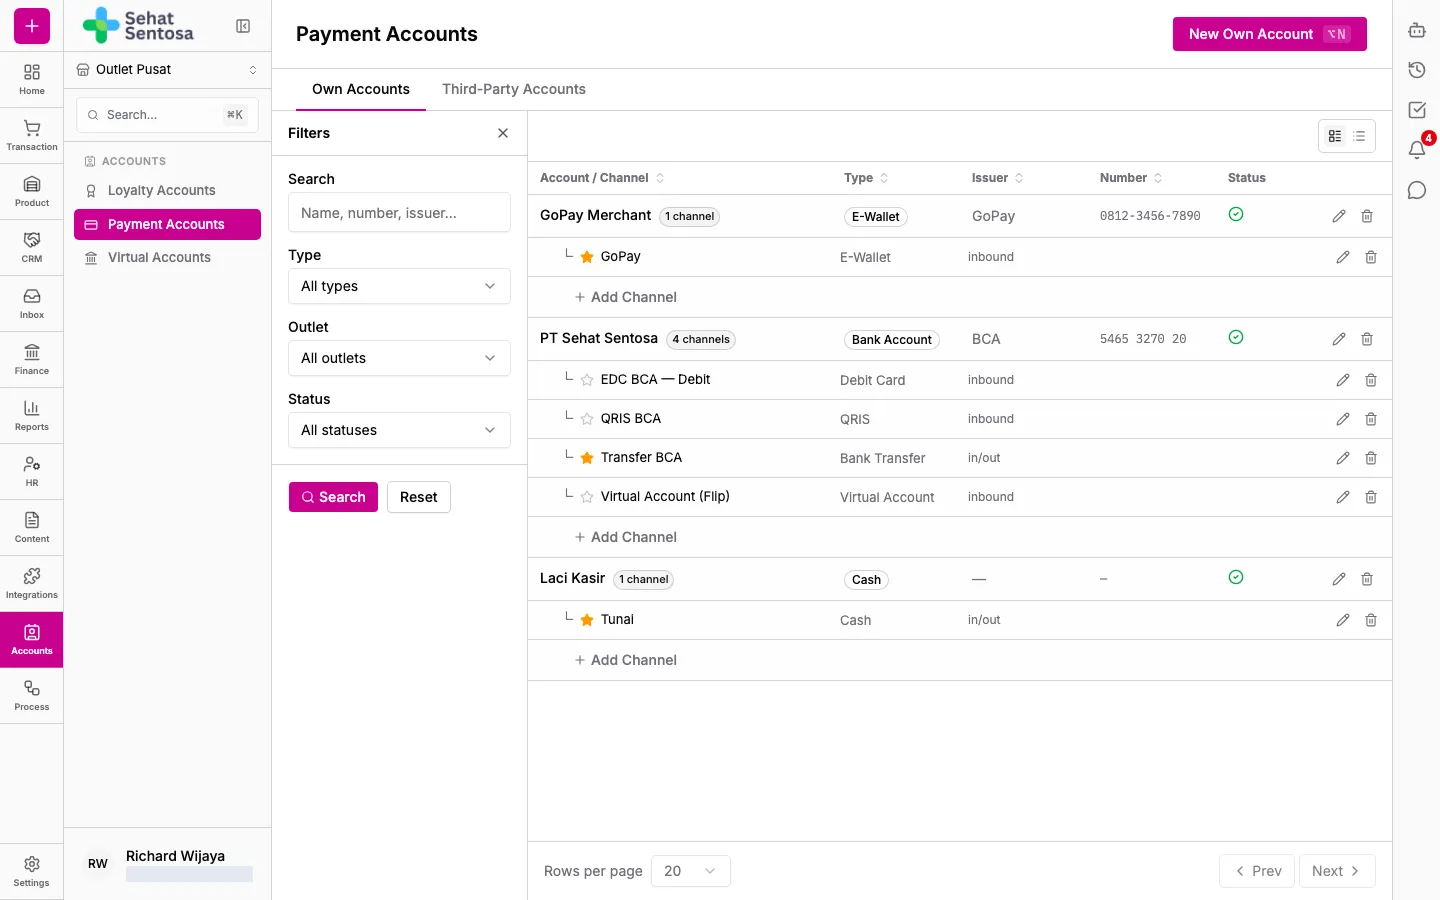
Add an own account
Section titled “Add an own account”- On Own Accounts, click New Own Account.
- Choose the Type: Bank Account, Virtual Account, E-Wallet, E-Money, Cash or Other.
- Choose the Purpose (Business, Personal or Other).
- Pick the bank (for bank accounts and virtual accounts) or type the issuer (for e-wallets and others).
- Pick an Outlet if only one outlet uses the account; leave it as No outlet (global) otherwise.
- Fill in Label (optional, shown instead of the account name), Account Name, Account Number and Remarks if needed.
- Keep Active ticked and save.
Add a payment channel
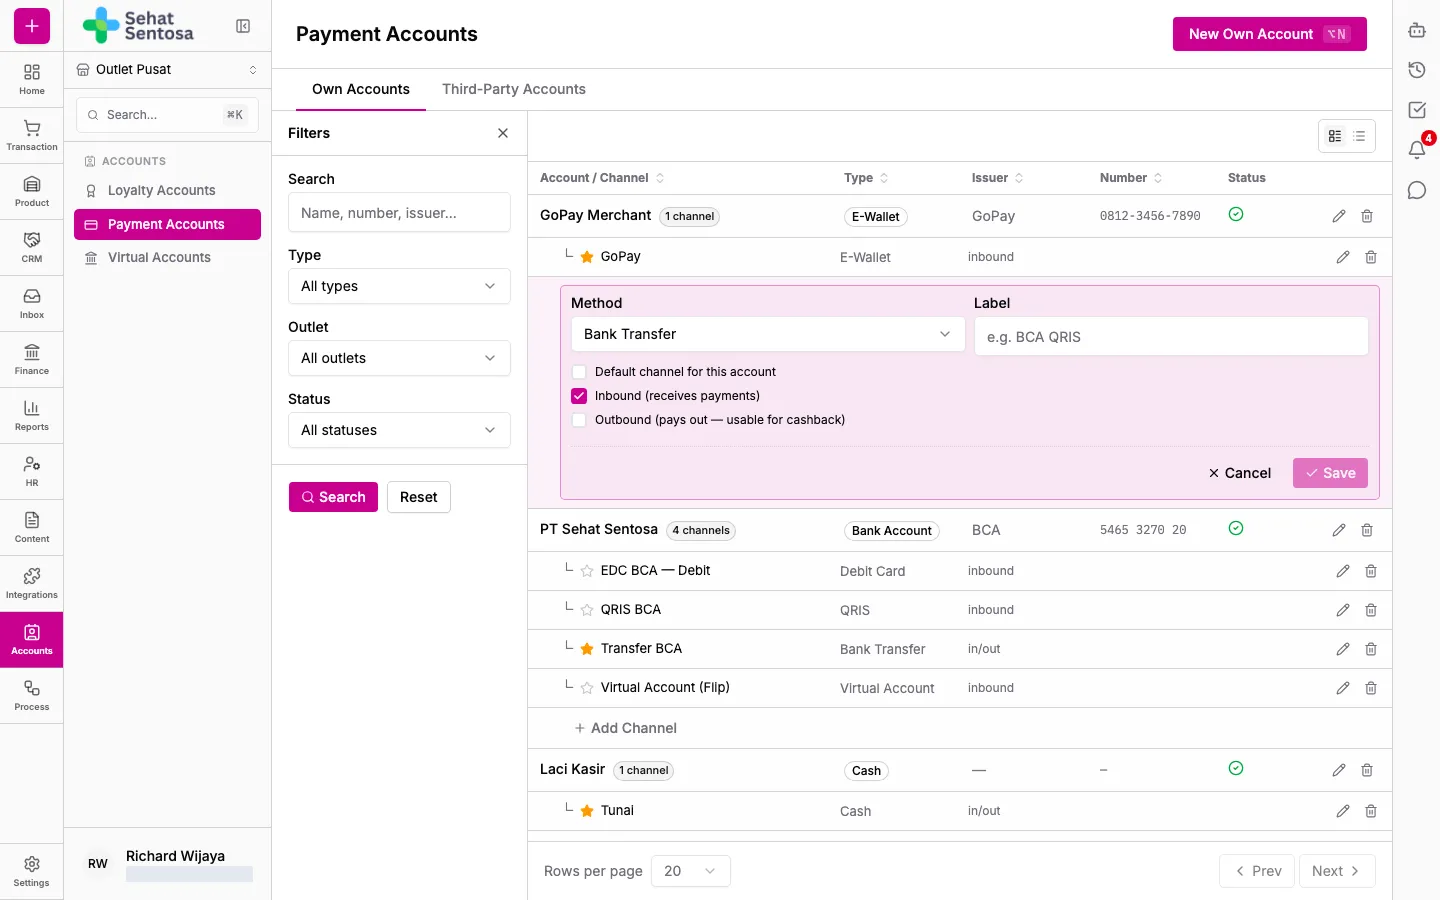
Section titled “Add a payment channel”Channels are listed under each account on Own Accounts.
- Under the account, click Add Channel.
- Choose the Method, e.g. Cash, Bank Transfer, QRIS, Debit Card or Credit Card.
- Enter a Label, e.g. “BCA QRIS”.
- Tick as needed:
- Default channel for this account
- Inbound (receives payments)
- Outbound (pays out — usable for cashback)
- Click Save.
To change the default channel, click the star next to a channel.
Verify an account
Section titled “Verify an account”For bank accounts, virtual accounts and e-wallets that have a bank and an account number, you can check the account holder’s name through the payment gateway.
- Save the account first.
- Open it and click Verify bank account, or click the shield icon on the account row.
- Verification can take a moment; reopen the account later to see the result. Verified accounts show a check mark.
Third-party accounts
Section titled “Third-party accounts”- On Third-Party Accounts, click New Third-Party Account.
- Fill in the same fields as an own account (no outlet or channels) and save.
Accounts linked to a customer or supplier show them in the Owner column. Use the filter panel (Search, Type, Status) to find an account.
Deactivate an account
Section titled “Deactivate an account”Click the delete icon on an account row. The account is deactivated, not permanently deleted.