
Setup checklist
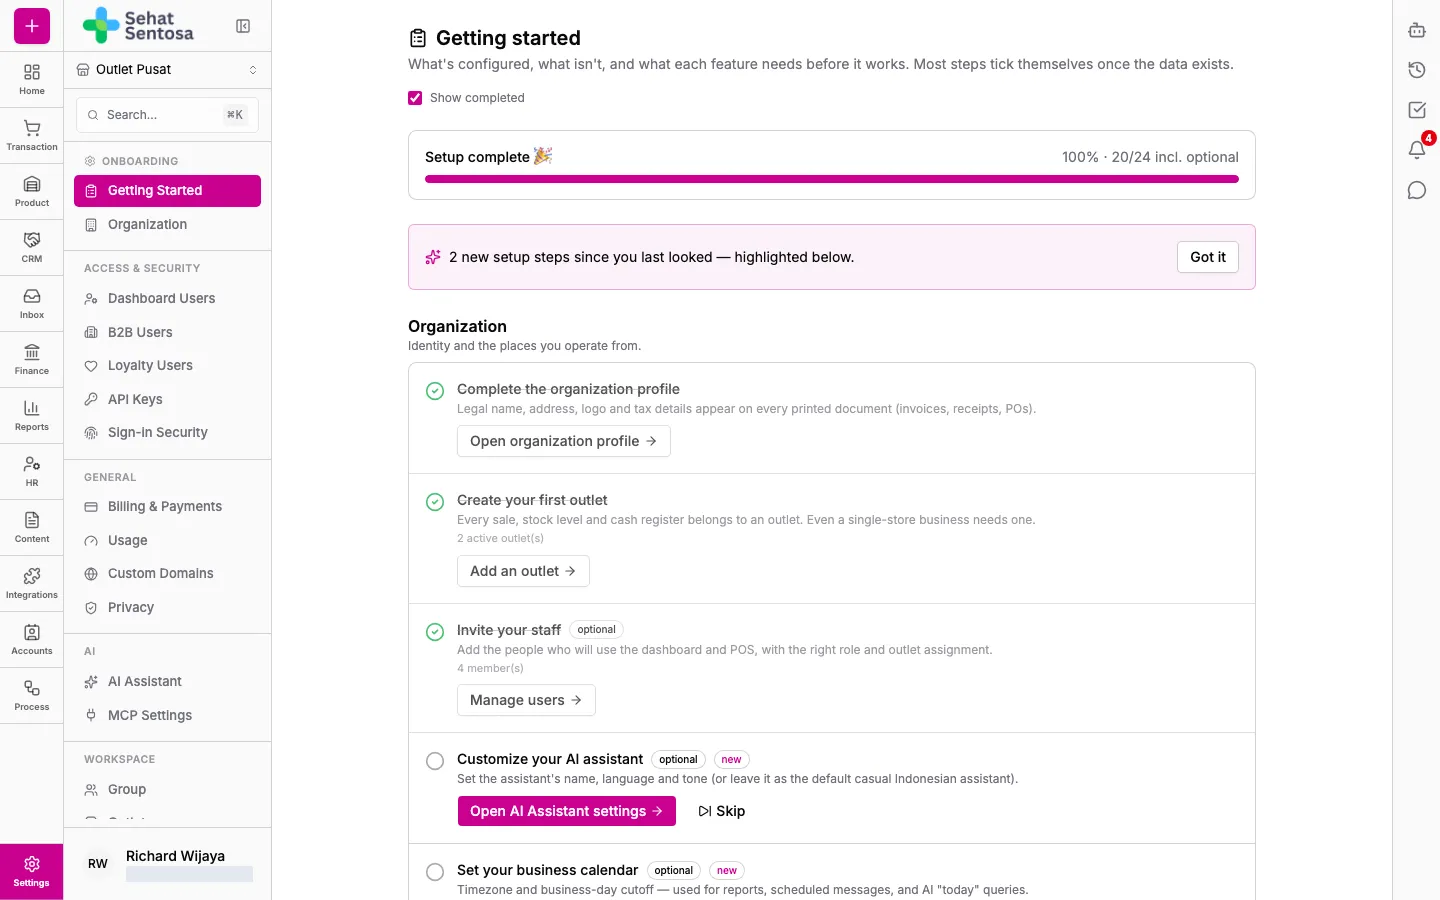
A new organization needs some basic data before the POS, stock and accounting work. The Getting started page lists those steps in the order they depend on each other. Only owners and admins can open it.
Opening the checklist
Section titled “Opening the checklist”- Go to Account & Settings → Onboarding → Getting Started.
- Steps are grouped by phase: Organization, Team, Sales & payments, Catalog & stock, Finance, Customers & CRM and Integrations.
Completing steps
Section titled “Completing steps”- Click the button next to a step (for example Add an outlet) to open the right page.
- Add the data it asks for. Most steps tick themselves once the data exists.
- Click Skip for steps you don’t need. Steps that can only be checked by hand have a Mark done button. Click Undo to reverse either.
Suggested order
Section titled “Suggested order”- Complete the organization profile (legal name, address, logo, tax details) — it appears on every printed document.
- Register a pharmacist as a contact (Employee and Pharmacist subtypes), then create an outlet and assign its responsible pharmacist.
- Invite your staff.
- Set up sales channels, payment accounts and their payment channels, then create a cash register.
- Check units, add products, then record opening stock with a purchase invoice or a stock opname.
- If you use accounting: seed the chart of accounts and posting rules, and open an accounting period.