
Channel prices and customer special prices
Medivy keeps several layers of sell prices:
- A default sell price per variant, used when no other price applies.
- A price per sales channel, for example a different price in store and on a marketplace. Channels are set up in Account & Settings → Sales → Sales Channel.
- A price per packaging unit. If none is set, the pack price is the base price × pack size.
- Volume discounts: tiered discounts for buying in bulk, set per product.
- An entity special price, a negotiated price for a specific customer.
Edit prices in Channel Prices
Section titled “Edit prices in Channel Prices”The Channel Prices page shows every product in a grid you can edit like a spreadsheet.
Menu: Product & Inventory → Pricing → Channel Prices.
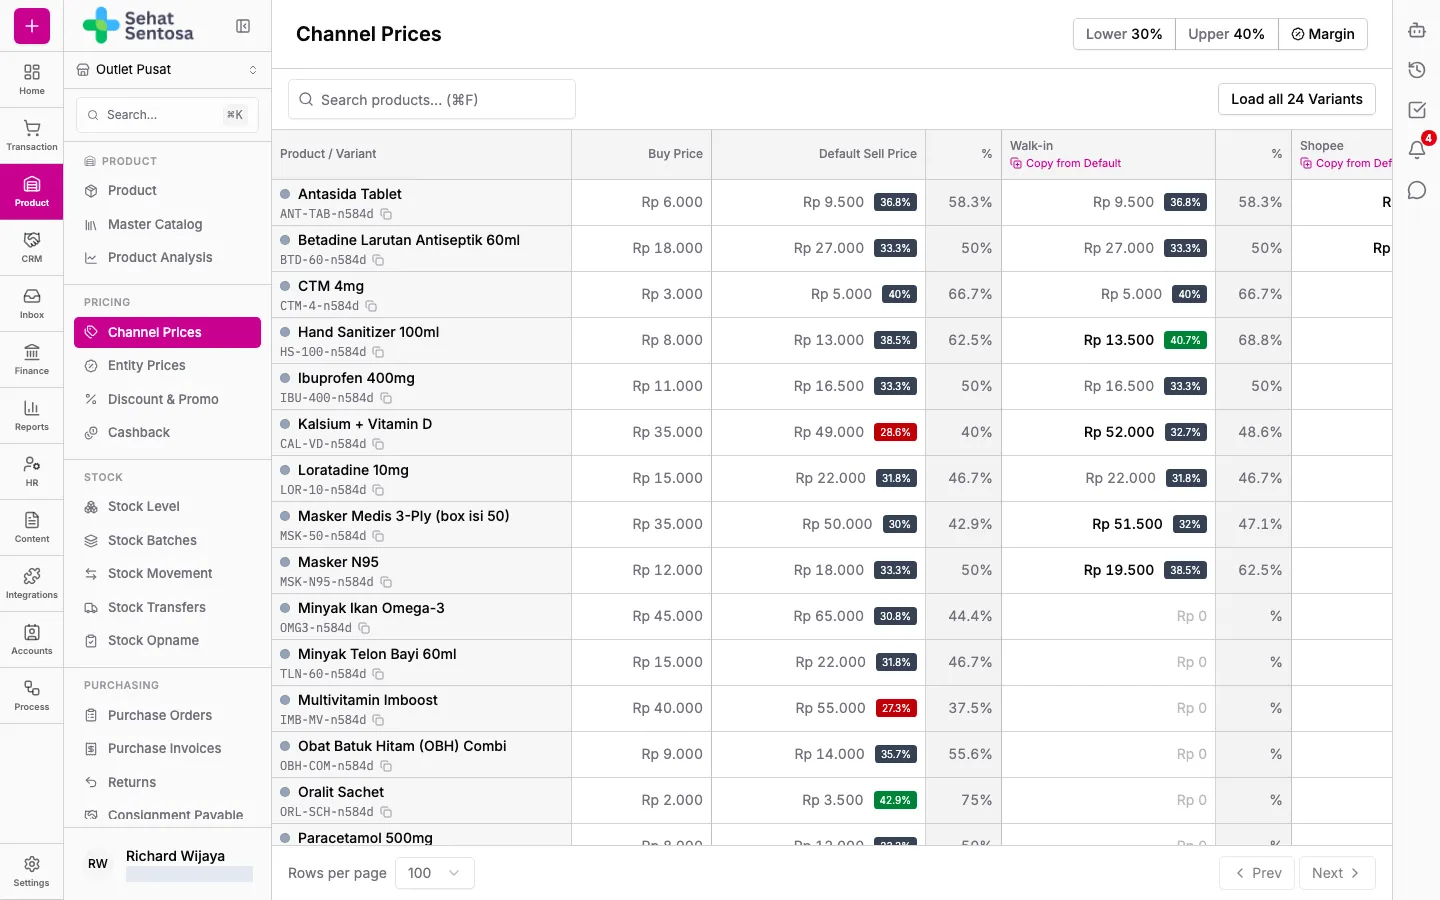
- Open Product & Inventory → Pricing → Channel Prices.
- Search in Search products… (⌘F) and press Enter. To filter without paging, click Load all Variants: every variant loads at once and the search filters in the browser as you type.
- Click the price cell you want to change and type the new price. Default Sell Price is the default; each channel has its own column.
- Alternatively, type in the % column next to a price to set it as a markup over the buy price.
- For products with several units, click the units icon next to the variant name to show per-unit prices, then type a price for that unit.
- Changes aren’t saved until you apply them. Click Pending Updates or Apply Changes. The Pending Updates panel lists each change with its Before and After value; remove any wrong ones, then click Apply N changes.
Shortcuts:
- Copy from Default in a channel’s column header fills every unset price on that channel with the default sell price. Prices already set are left alone, and prices above the retail price cap (HET) are skipped.
- Copy price on a variant row sets every channel’s sell price from the default sell price, or from the buy price × 1.3 if there is no default.
A marker next to each variant’s name helps tell variants apart: a filled dot when the option value is a color (for example “Blue” or “Merah”), or a ring for other values such as sizes. Markers aren’t printed.
Margin guideline
Section titled “Margin guideline”The badge next to a price shows the gross margin: red below the lower limit, green above the upper limit.
- Pick an outlet in the outlet switcher in the sidebar.
- Click Margin at the top of the page.
- Enter Lower (%) and Upper (%), then click Submit.
Volume discounts
Section titled “Volume discounts”Volume discounts give tiered discounts when a customer buys in bulk, for example 10% off from 10 boxes. They apply on proposals, estimates, invoices and the POS.
- Open the product from the catalog and pick Volume Discounts in the left menu.
- Click Add Tier. The New Volume Discount Tier panel opens.
- Pick Applies to (a specific variant, or leave All variants) and tick the Sales Channels the discount applies on.
- Enter a Tier Name (for example “Bulk 10+”), pick the Quantity Unit, and fill in the Minimum Quantity.
- Pick a Discount Type: Percentage, Fixed Amount (IDR) or Fixed Batch Discount. For batches, pick Batch Based On (Quantity or Amount (IDR)) and Discount Per Complete Batch. Only complete batches get the discount; any remainder is charged at full price.
- Fill in Discount Percent or Discount Amount (IDR). Optionally set Max Base Qty (optional), Max Deduction (optional) and the Valid dates.
- Tick Active and save.
Tiers are grouped by sales channel. Click a tier’s row to edit it, or the bin icon to remove it.
Stacked tiers. A percentage tier can build on a lower percentage tier of the same price: give it a higher minimum, pick On top of <tier> (x%) under Percent, and enter the Extra Percent. The lower tier’s percent applies first, then the extra percent comes off what remains (10% then 5% more = 14.5%). If you remove the base tier, the tiers built on it keep their current total as a flat percent.
Volume discount simulator
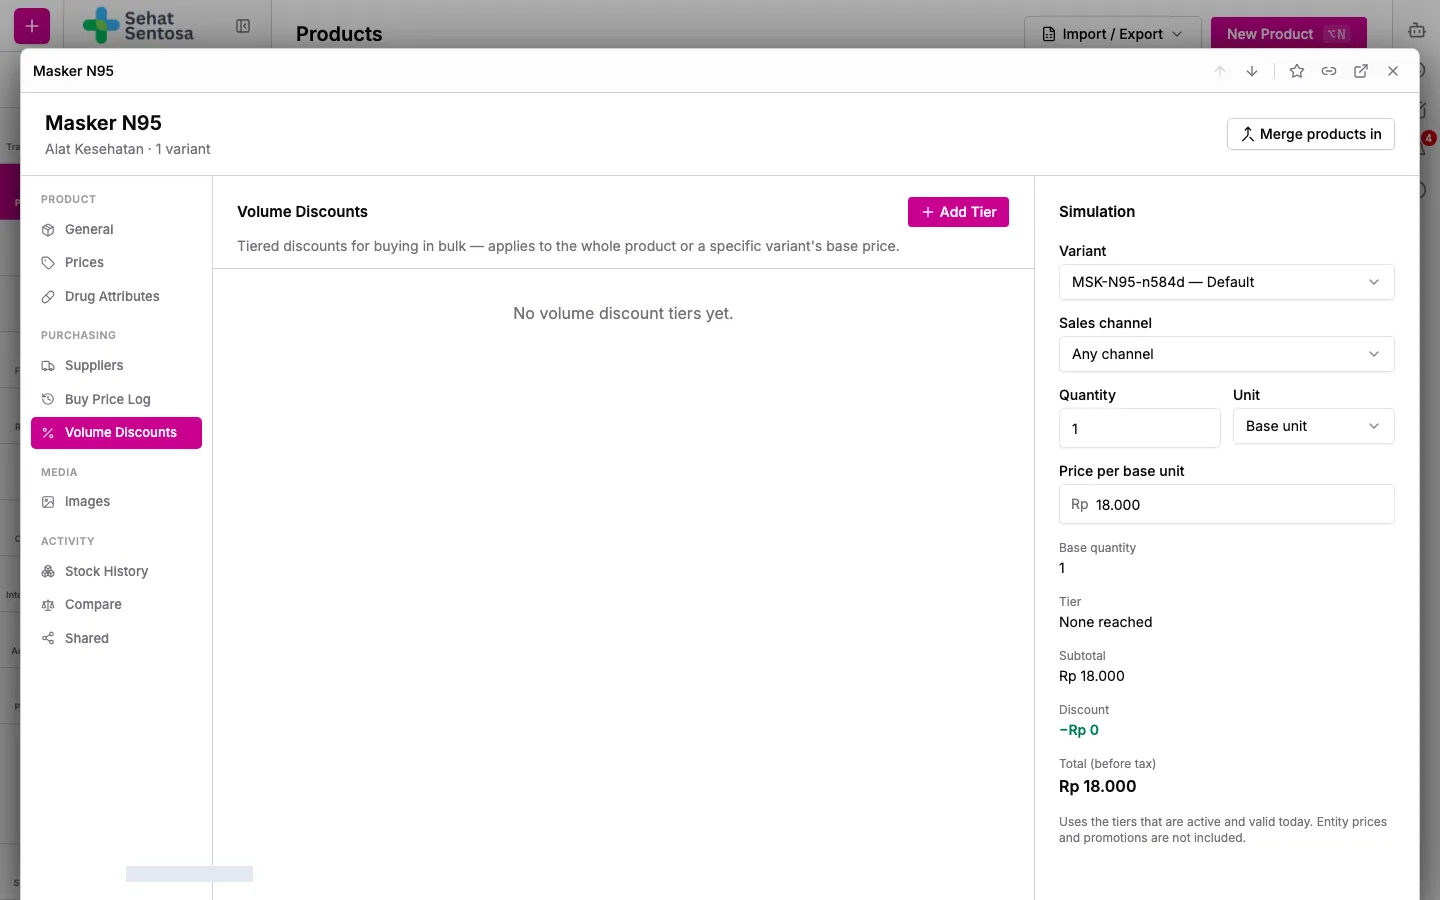
Section titled “Volume discount simulator”The Simulation panel beside the tiers works out the price for a sample quantity:
- Pick a Variant and, if needed, a Sales channel.
- Enter a Quantity and pick the Unit. Price per base unit is filled in from the sell price and can be changed.
- Read the Base quantity, the Tier reached (marked Active in the table), Subtotal, Discount, Total (before tax) and Next tier.
The simulator uses the tiers that are active and valid today. Entity prices and promotions aren’t included.
Special prices for customers (Entity Prices)
Section titled “Special prices for customers (Entity Prices)”An entity price is a negotiated price for a specific account, contact or lead. It is used on sales proposals and invoices (the Commercial menu) for that customer, and takes priority over channel prices.
Menu: Product & Inventory → Pricing → Entity Prices.
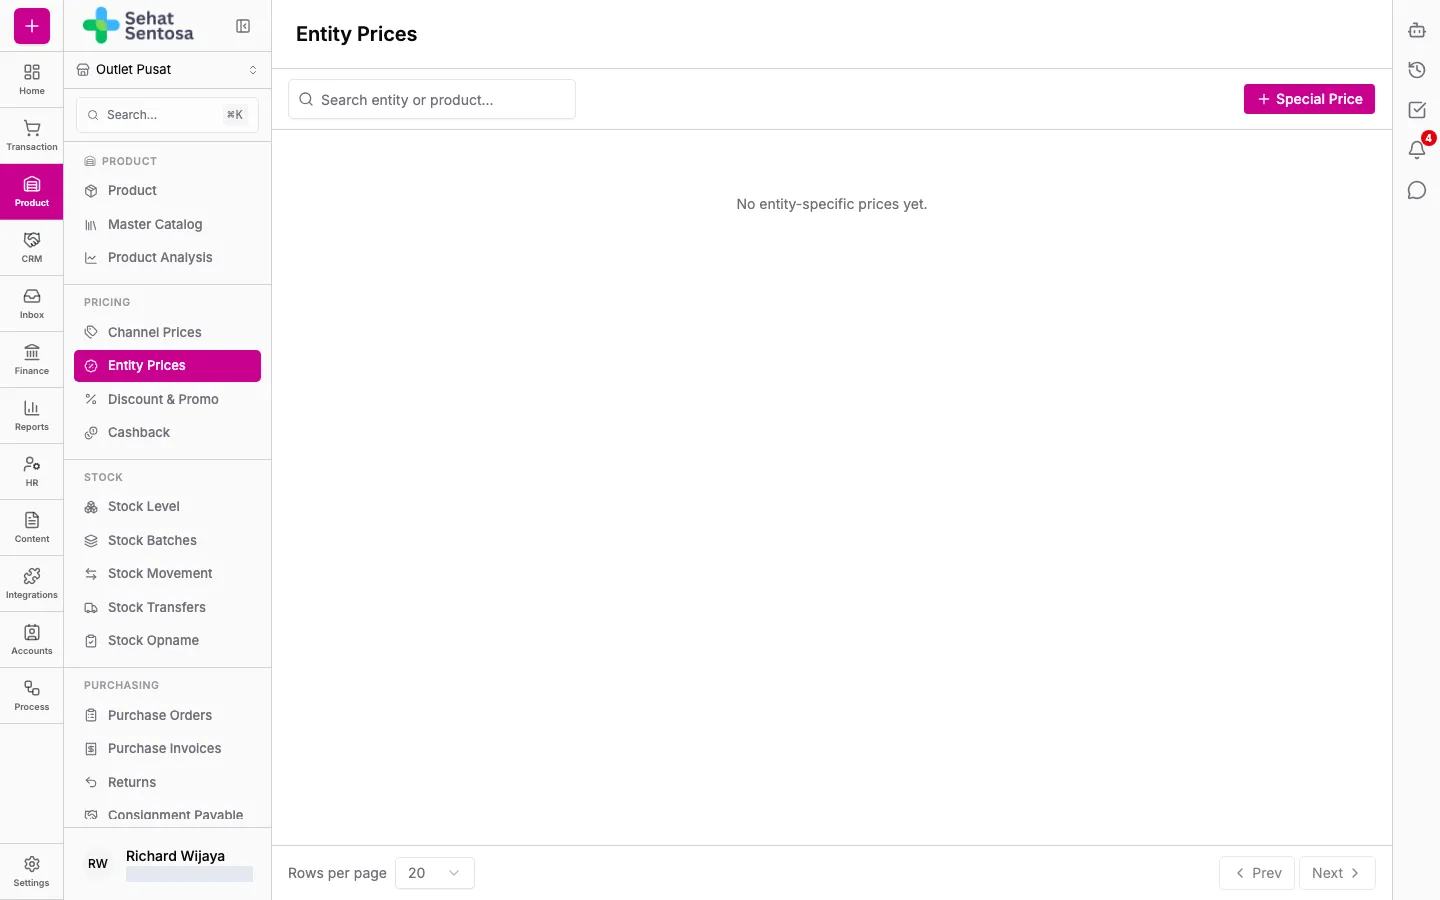
- Open Product & Inventory → Pricing → Entity Prices.
- Click Special Price. The New Special Price panel opens.
- Pick the Entity (account, contact or lead) and the Product.
- If the product has several variants, pick a Variant, or leave All variants.
- If the product has packaging units, pick the Unit. The special price is per the chosen unit.
- Enter the Special Price (IDR) and, if needed, a Min Purchase Qty.
- Click Set Price.
The list shows the base price, the special price and the difference as a percentage (Discount). Click a row to change the price, or the bin icon to remove it.